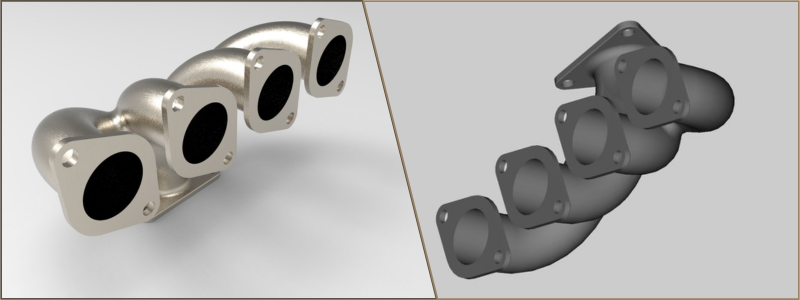
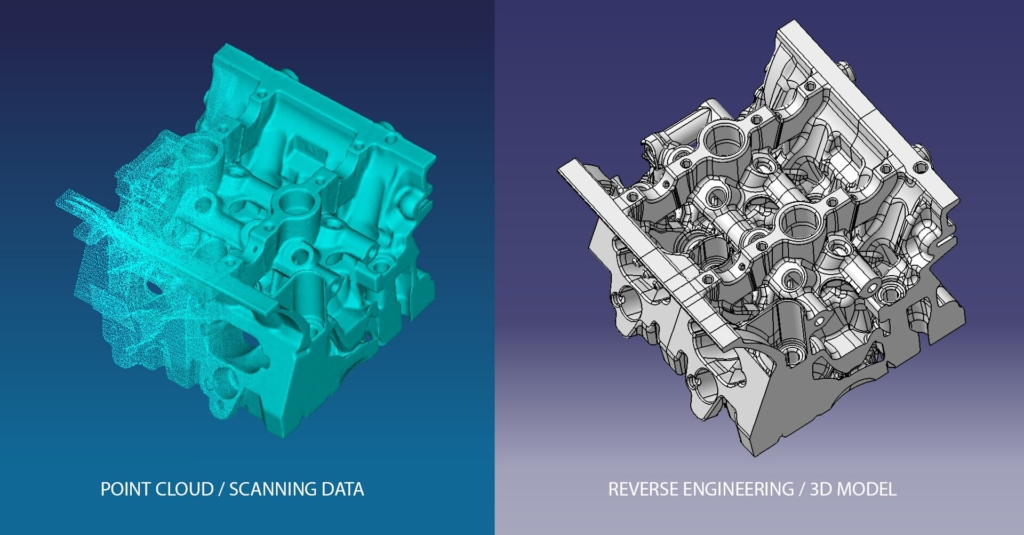
In simple words, a 3D scanning service is the process of recreating physical objects into 3D models in a digital environment. It has become a cornerstone of reverse engineering and is widely used in the manufacturing industry. Once the scanned objects are translated into a 3D CAD model, you can manipulate them in all kinds of ways and for all sorts of purposes, from scientific research to design reinvention and everything else in between.
🚀 Table of contents

RELATED: 3D scanning services: Complete cost breakdown for your company
Overview
Not every 3D scanning technology is created equal. You have plenty of options, each with its own strong and weak points, but you can always start the selection process by taking into account the types of objects you want to scan in the first place. For instance, a scanner created specifically for architectural style digitization might be unsuitable for product design development. And what a particular scanner does best has everything to do with the underlying technology, of which there are three major different types, including:
- Photogrammetry: one of the most easily accessible 3D scanning technologies, photogrammetry works like a 360-degree camera. A 3D scanner with this technology captures a number of images of an object from various angles and uses those images to generate an approximate for a three-dimensional digital model.
Because photogrammetry recreates the object from photos, the resulting model also includes superficial details like colors and textures. It’s the scanning method of choice when the 3D models are meant to be used as assets in video games, virtual reality rendering services, and architectural study. Photogrammetry is especially popular among 3D printing enthusiasts as well. - Laser triangulation: as the name suggests, a laser-based 3D scanner works by projecting laser lines or dots onto multiple points on the object’s surface. It measures the distance traveled by the beams to determine the exact position of each dot (relative to the scanner) to reconstruct an expert 3D model.
Among all laser-based scanning technologies available at the moment, the laser-triangulation method is best for small object applications, such as small machine parts or product component engineering. The points of measurement are determined based on the reflection angle of every laser beam to generate an extremely accurate 3D model representation of the object. Professional laser triangulation 3D scanners are expensive, but they’re so precise that they’ve become indispensable for reverse engineering purposes. If you have to rebuild and re-engineer small parts based on legacy models, there’s no better tool to guarantee accuracy than a laser triangulation scanner. - Structured light: the technology also makes use of the triangulation technique, but it projects light (rather than laser) onto the object. Unlike its laser-based counterparts, the scanner can only project light from one specific vantage point at a time, so it takes multiple scans to reconstruct the object as a 3D model.
All images are then combined to generate a 360-degree mesh. You can also place the object on a motorized turntable to circumvent the limited vantage point constraints, so instead of moving the scanner around the object, you make the object turn to full rotation under the projected light. One of the biggest differences between laser triangulation and structured light scanners is that the latter often works better with reflective or shiny objects. Also, some laser scanners can damage human eyes.
All three standard scanning technologies mostly deal with recreating the geometry or surface area of the object. If you have to work with small parts that have complex internal mechanisms, CT (computer tomography) scanning outperforms any other. CT scanner captures not only the object’s external surface but also the internal geometries, making it ideal for an intricate design where every little detail matters and is crucial for the object’s functionality. In other words, you need an industrial-grade CT scanner when the physical object has invisible internal features, likely hidden or concealed by overhanging geometries.
RELATED: 3D scan cleanup – Top reasons your company or firm should use this service
The scanning process
3D scanning is an impressive technology, but it involves a pretty elaborate process to generate an actually workable 3D model of the object. Unlike scanning a piece of paper into a PDF document, this task also requires a CAD professional to manipulate the mesh into the desired model.
Creating the mesh
Following the initial preparation step, where you take the object and the 3D scanner, you position the object in place and fire up the device to capture the external geometry. The resulting data is called a point cloud, which basically is a simple set of points on a 3D coordinate system. Point clouds are not exactly 3D models, but it is possible to make some little adjustments and make it usable as a 3D printing file. In a design and engineering workflow, however, the point clouds must be converted into a different kind of CAD file to be useful for any practical purpose. Most 3D scanning software, such as Meshmixer and ReCap Photo (both from Autodesk), can automatically connect the dots of the point cloud and fill the spaces in between to create a solid surface model called mesh, consisting of interconnected edges and vertices. A properly generated mesh should represent the external surface of the scanned object, complete with dimension data. The mesh model appears like a true three-dimensional visualization, but it’s hollow on the inside.
Mesh to solid
The first output of a 3D scanning process is a mesh, usually saved in STL format compatible with most 3D printers. Mesh models have no useful information about the object except for the polygons that comprise the shape. Apart from 3D printing services and applications, there is only so much you can do with a mesh; for all other engineering purposes, you have to transform the file into a solid model. This isn’t going to be a simple conversion where you upload the file and let the computer do all the work. The mesh only serves as a reference for creating the surface geometry of a full 3D CAD model. Bear in mind that a “solid model” created based on the geometry information is essentially a 3D rendering. If the engineers and designers decide to make changes to the original design, the solid model must be converted yet again to a 3D CAD drawing.
Everything else, from types of material and heat/electrical conductivity to density and thickness, must be registered manually. The modeler may input an inundated number of details to make sure that the model accurately represents the scanned object. And the great thing about solid CAD is that engineers can alter the details even further to refine, improve, and modify the design in every possible manner. That way, they can figure out how the physical object was constructed in the first place, what small parts are used in the design, how each part affects other components in the object, and so forth. A 3D solid CAD can be divided into multiple sections as well, allowing engineers to conduct a close examination of each and determine all the internal specifications, such as fitting tolerances and threading. After they make all the alterations deemed necessary to achieve the new design, the model can be re-rendered to compare the changes to the original.

RELATED: How reverse engineering services use 3D laser scanning for design
How 3D scanning enhances design engineering
The manufacturing industry, whether a prototype fabricator or an expert engineering firm working on improving an existing design, can benefit from 3D scanning technology in several ways:
- Digital twins: one of the main points of having a physical object 3D scanned is to have a digital twin ready for analysis. Engineers run the digital twins of manufactured parts through a series of simulations to see how they perform under various hypothetical conditions. The analysis is then used as the basis for predictive maintenance and the design plan for future products. All data gathered from the analysis should also lead to better-informed design decisions in an attempt to improve manufacturing efficiency and minimize production costs at the same time.
- Digital iterative design: the combination of 3D scanning and 3D printing gives full meaning to the term “rapid prototyping.” The process starts with 3D models printed to bring the design ideas to reality. After some changes and refinements to the digital models, engineers can scan the already-printed parts to observe tangible improvements, if any. Engineers and designers can repeat the iterative process as many times as necessary until they arrive at the desired level of product performance and aesthetics. 3D scanning and 3D printing combination might only work best if the part is made of plastic. While there are now 3D printers that can work with metal materials, it remains today cost-prohibitive for small companies.
- Reverse engineering: in the event the manufactured part was created decades ago without a CAD design process at all, there isn’t going to be a 3D model of the object anywhere. Instead of redrawing a brand-new 3D CAD model, engineers can tap into the power of 3D scanning to generate the mesh and build a digital model by using the physical object as a true point of reference. They can treat the finished digital model as a manufacturing document to either rebuild the object without changes to the original, improve the design, or increase production efficiency by incorporating modern fabrication techniques. Reverse engineering services with 3D scanning has been popular in the automotive aftermarket parts and tuning services.
Some companies that produce large numbers of small parts (especially those with little to no internal mechanisms) have been able to implement 3D scanning as part of their Quality Control process. As soon as a manufactured part reaches the end of the production line, a 3D laser scanner inspects the object to check for improper geometry or defective surface area.
Cad Crowd for your 3D scanning applications
It’s been mentioned before that while the actual 3D scanning process itself is pretty straightforward, converting the mesh into a workable 3D CAD model can be a daunting task when you have no professional 3D modeler on your team. Even a small mistake can cost you hours of meticulous work that gives nothing but an unusable 3D asset. At Cad Crowd, we’ve been working with thousands of experienced 3D CAD professionals, both modelers and render artists, with verifiable track records in handling small and big projects in the manufacturing industry. Give Cad Crowd a call for your free quote and start building high-quality 3D models of your parts.

