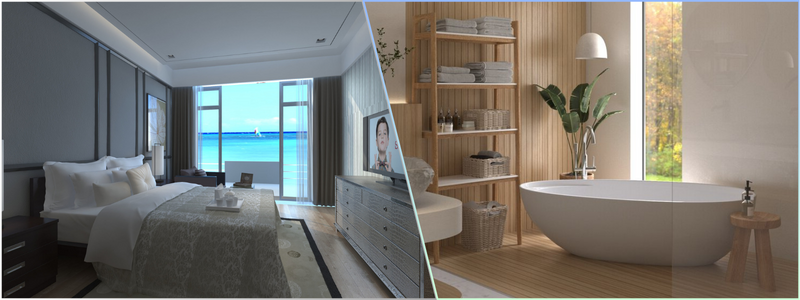
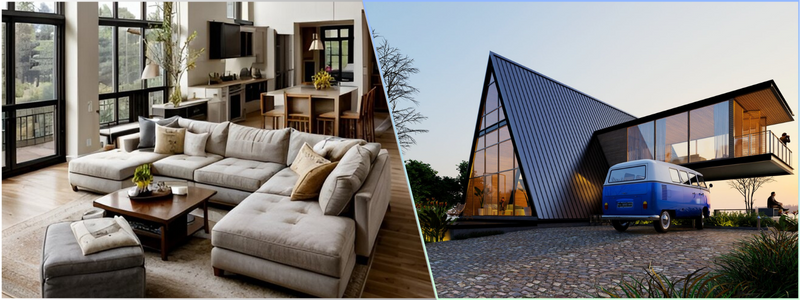
Using proper lighting techniques for 3D renders will create more stunning and enticing images. At its most basic level, lighting is what makes objects visible. However, if you ask any 3D rendering firm, they will tell you there is more to lighting than meets the eye. With the help of lighting, you can add a touch of mood to any piece to set the tone. Lighting also lets you subtly entice the viewer to take the object out of the 3D world to give it the feel of a photo or the warmth of an oil painting.
If you’re trying to model a real-world project, it’s essential to use the right lighting and make the necessary adjustments to stand the chance of achieving a more photorealistic finish. Here are some essential tips for companies and services on making the correct lighting adjustments in 3D renders:
 Table of contents
- 14 Tips for companies and services on making the correct lighting adjustments in 3D renders
- 1. Opt for a strong contrast to add drama to the 3D render
- 2. Incorporate selective highlights in 3D renders
- 3. Establish a gripping 3D rendering composition
- 4. Add more lights to the 3D render
- 5. Keep it clean in compositing 3D rendered images
- 6. Play with the lenses
- 7. Gather several lighting references
- 8. Light up a scene
- 9. Light several materials
- 10. Put the main light in the right position
- 11. Direct the gaze of viewers with effects
- 12. Be subtle with the light spill
- 13. Add light in a natural way
- 14. Let there be light in 3D renders
- How Cad Crowd can help
14 Tips for companies and services on making the correct lighting adjustments in 3D renders
1. Opt for a strong contrast to add drama to the 3D render
Adding a strong contrast to a 3D render is an example of how you can direct attention to just one aspect of the image by using contrast to develop a silhouette. A strong contrast involves a clear separation of negative and positive space to help emulate a high-end photograph’s quality and deliver something more dynamic and exciting than just a simple model.
RELATED: What are the different types of 3D rendering services?
2. Incorporate selective highlights in 3D renders
When the architectural rendering services use photographic techniques like a shallow depth of field it offers another great way to draw attention to a spot. However, selective highlights can help you achieve a similar result as well. The main concern with a shallow depth of field is that in-focus details will be at the front of the image, making it harder for the viewer to determine where to look. You can use selective highlights to pick out the texture on some parts in 3D renders, giving the image a tactile quality while ensuring it doesn’t look flat.
3. Establish a gripping 3D rendering composition
The 3D rendering composition can work hand in hand with lighting in terms of manipulating the eyes of the viewers and directing the focus and attention exactly where you want it to be. Even with the perfect textures and models, everything will be useless without a good composition. Consider looking into traditional art theory if you’re struggling with the 3D rendering composition. Photographers and artists have devised various rules for successful compositions, including the Golden Ratio, the Rule of Thirds, and the grid theory. You can use proper lighting to support the composition when you know where you want the viewer’s attention.
RELATED: 3D Modeling vs. 3D rendering services
4. Add more lights to the 3D render
Adding more lights to the 3D render will help you justify the bounce of light depending on the requirements and situation. Try describing the areas you want to light as much as possible. The best thing you can do here is to begin in complete darkness. However, clumsy lighting will result in washed light that is difficult to control. Explore various lighting effects with 3D architectural visualization services, but remember why a specific light is in a particular spot.
5. Keep it clean in compositing 3D rendered images
Compositing is the final phase of creating a 3D rendered image. It enables you to combine multiple layers to influence the color, contrast, lens breathing, motion blur, depth of field, and everything else needed to make your photographs seem like they were filmed using a movie camera. It’s important to remember that things are easier left for the compositing phase instead of wasting your time doing it in 3D.
6. Play with the lenses
You don’t have to stick with the usual 50mm lenses. You can combine several lenses, camera movement, angles, duration, and speed. The camera’s height can also change to give off a different impression. In turn, this will help open new opportunities for lighting that you probably didn’t even consider before.
RELATED: How photorealistic 3D rendering design saves companies money

7. Gather several lighting references
Even if you’re confident with your visual memory, never try lighting if you don’t have a reliable pile of reference materials from which you will be working. Look for photos that the 3D modeling designer can 3D model something from the real world. If that’s impossible, or you want to create something from your imagination, you can take pictures for a lighting reference. Put an object against a plain background and surface. Light it from a specific direction and capture the photo.
Move the light around and photograph the result to have a more extensive collection of photo references to apply shadows and highlights for various light sources. You can also do the same with transparent objects. Place several things in a scene to review the behavior of light once it hits several objects.
8. Light up a scene
Lighting is how you set the scene for an image in its most basic sense. If you happen to be dealing with an object in the real world, consider how lighting will be used in real-life settings. For example, motor shows (auto shows) typically use darker backgrounds, with the spotlight strongly directed at the vehicle being unveiled. The setup itself is not complicated but is recognizable, and this helps you make the 3D rendered image feel and look more believable.
RELATED: Freelance 3D rendering services for industry applications
9. Light several materials
You can make the best out of the textures by playing with the angle of your lighting source. Ensure that the lighting is placed in such a way that accentuates the textures. Placing the light in the wrong position might lead to losing details. The 3D photorealistic rendering firm can achieve photorealism with 3D rendering, you can achieve your goal by emphasizing recognizable elements.
10. Put the main light in the right position
Using shadows and lights helps tell a story or convey the mood and atmosphere. The main light should be positioned correctly, with its shadows outlining the structure and shape of the scene. In addition, the lighting also influences the composition as it separates the negative and positive space in a 3D rendering.
11. Direct the gaze of viewers with effects
Getting carried away with shiny light effects like glow and bokeh can be tempting. However, if you use them excessively, you will lose impact. Instead, try restricting these to strong lighting highlights on some parts of the 3D rendered image and other strong light sources.
RELATED: Architectural lighting plan budgets & tips to reduce CAD drawing service costs
12. Be subtle with the light spill
Every 3D rendering artist who enters the 3D visualization realm is inclined to experiment with the light spill in all their 3D renders. Although light spill transforms the atmosphere and mood of the whole composition, you still need to use it with extra care to attain extremely believable effects. The key to developing realistic light spills is to be subtle every time you use them. Sunbeams, for example, should not be harsh. Add a soft spill around sunbeams so that the 3D render will look more natural and realistic. Learning the areas in the 3D render to illuminate and cast shadows on will help you determine the right angle and position of the light spill and the primary light source.
13. Add light in a natural way
3D rendering artists are often free to do anything they like with their 3D renders since the software tools they use don’t limit their possibilities. Although this is ideal for artistic purposes, a 3D rendering expert who tries to mimic real-life situations might go over the top with artificial lighting. Many 3D visualization beginners opt for light colors that are not saturated enough or are too saturated.

Striking the perfect balance and developing surfaces that can respond realistically is difficult, especially if you have many options. The general guideline is that green, blue, and red values should be between 0.2 and 0.8 in the 3D rendering. This way, you can be sure that your 3D renders will be balanced to the point that they look artificial or undersaturated, which doesn’t look good.
RELATED: 5 Business tips for creating photorealistic interior renderings for your company
14. Let there be light in 3D renders
Lighting is the finishing touch for 3D renders. Proper lighting techniques can create dimension and depth and convey a particular mood. At the same time, you can significantly improve the visual appeal of a 3D model. Understanding the critical role of lighting in 3D rendering and 3D visualization allows 3D architectural visualization designers to create realistic scenes that are suitable and appropriate for the intended use.
How Cad Crowd can help
Browse Cad Crowd to find the best 3D rendering experts for your projects. A skilled 3D rendering expert will use the best lighting tips and techniques to transform your project for the better!

