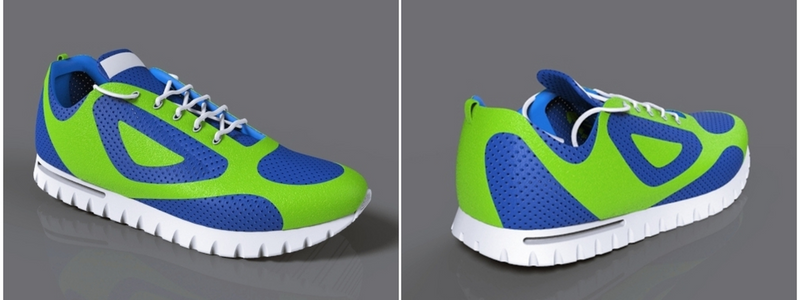
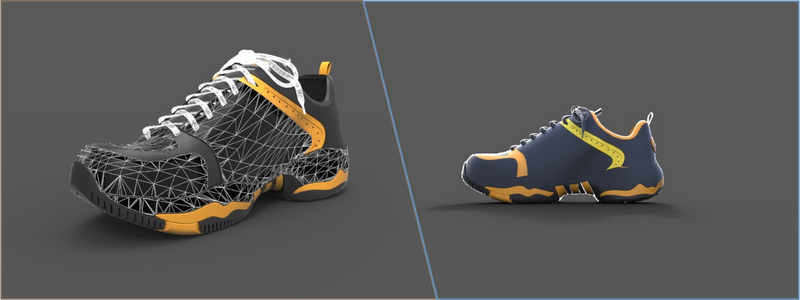
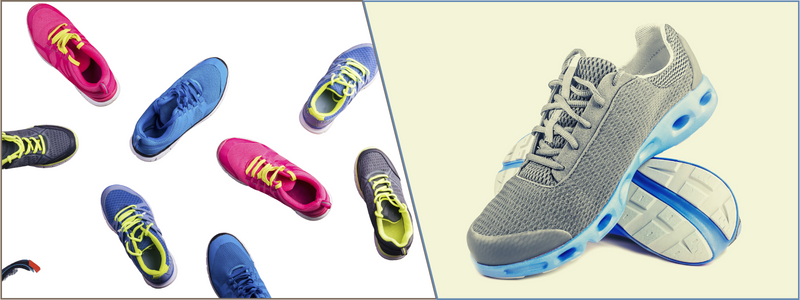
Today we are sharing information about shoe prototype rates, sneaker design costs, and runner 3D modeling pricing for companies. The first phase in every physical product design is concept development, and the early stage of the development usually involves brainstorming that results in many ideas. As the process moves forward, the alternatives are narrowed down to several options. There will be a shift of focus from superficial details, such as colors and shapes, to innovation and functionality.
Table of contents
Product designers approach the process by emphasizing styles before engineers take over and refine the structures/construction. Things are no different in the footwear industry. Traditionally, the designers make rough sketches on paper and then hand the drawings over to a craftsperson for wax or wood model.
RELATED: 12 Awesome examples of ergonomic product design
At the end of this exercise, the shoe begins to take shape as the edges, faces, and vertices become more clearly defined. 3D modelers have now taken over the place of a craftsperson. Instead of developing wood models, they create digital photorealistic drawings of the design on a computer. If the initial design requires revisions, CAD software offers a range of tools to make modifications and add or remove features. Once the design obtains approval from the designer, the next step is to build a prototype.
Shoe prototype rates – the cost of a prototype
An independent shoe designer or a small startup does not likely have an in-house prototype-making capability. They must find a manufacturing partner to transform their design into reality. The partner will help you purchase the required materials and lend the manufacturing equipment for a fee. It costs anywhere from $600 to $7,500 for new product prototype services, depending on design complexity, embellishments, and features.
RELATED: What are industrial design rates & costs at product design services firms?
Prototyping may take several days to a few months until the designer receives the final design. A simple breakdown of the cost is as follows:
| Design Phase | Cost |
| Shoe last | $0 – $750 |
| A pattern based on drawing | $250 – $500 |
| Outsole blueprint | $150 – $600 |
| Solid model of the outsole | $100 – $400 |
| Preliminary sample pair | $50 – $100 |
| Prototype pair | $50 – $100 |
If you are willing to use an already available shoe last (the factory doesn’t have to build a new one), the prototype maker will probably charge you zero dollars for that; there is no work involved. An off-the-shelf shoe is often the model created for a previously manufactured design. When a new injection mold is required, be prepared to spend no less than $5,000 for the mold alone.
RELATED: How much does 3D CAD modeling design cost & what are the prices for freelance design service firms?

Shoe development process
Like any other product development service, creating a new shoe design mainly involves transforming CAD drawings into physical footwear. Unless you want to wear the shoes and never sell the products, the development phase ends at prototyping. After you receive the preliminary biological sample (an alpha version), you may want to reiterate the styles and design approach.
Evaluate the shape, colors, comfort, materials, and overall quality to see if everything meets the intended specification. If revisions are necessary, the prototype maker will implement the suggestion for the final sample pair (the beta version – a final prototype).
Should you hire a shoe developer?
Chances are you want to build a prototype, not just for prototyping. You do not design a new shoe and order a physical sample just for fun. In most cases, you want to commercialize the product. A shoe developer can significantly assist the endeavor unless you know what you’re doing. A shoe developer provides oversight to the development process and ensures the design goes into the production run or at least the prototyping phase.
RELATED: Accessible design: better products for everyone
A 3D designer is responsible for the aesthetic aspect of the footwear, whereas a developer handles all the other technical sides of the product. The responsibility of a shoe developer may include material selection, the design’s structural integrity, comfort factor, development schedule, and determining the target price. It is not uncommon for a designer to take a freestyle approach to shoe design. The developer’s job is to keep everything within the feasibility constraints, technically and financially.
During production, the developer ensures every pair is manufactured per your specifications. Established shoe companies also work similarly. However, the designers and developers are in-house professionals, and some makers also have product design consultants.
RELATED: How-to guide: new product design, engineering, and prototyping your idea for mass manufacturing
Getting the prototype made
Established shoe brands never have trouble having their prototypes made for free. All prototype makers want to build a strong portfolio in an increasingly competitive business landscape. An experience working with international brands will boost their reputation and carve the path to acquiring more clients. It is a low risk to prototype a famous brand, yet it comes with a massive reward if the sample is used as the base model for large-scale production.
An independent designer doesn’t have that kind of luxury. Every prototype designer has a different pricing strategy, but you can expect to pay at least 200% of the actual price. If the pair of shoes – when it goes to production and is sold to the public – costs $50, the prototype is priced at $100 minimum. Tooling cost is billed because the equipment is prepared outside the prototyping facility.
RELATED: Learn about 3D product rendering costs, rates, and pricing for 3D visualization services?
Working with an agent with factory contacts is undoubtedly better for an independent designer or startup. Hiring an agent will add to the total cost. The agent’s main job is to bridge communication between the designer and the prototype maker, so the former can avoid bumping into too much trouble getting the idea approved. Some factories have minimum order quantity.
An agent can help you place as small an order as possible as a cost-saving measure. The factory purchases materials and tools from the most affordable suppliers, and this is also where an agent comes in. You may not always have the most incredible selections, but at least you have the chance to get the best for your money.
Prototype development timeframe
After the original idea is submitted, a prototype maker needs around two weeks to develop the pattern and colors. Outsole tooling may take up to eight weeks to prepare, and revision following a preliminary sample is done within a few weeks. The final prototype will have to wait a little longer if the modification requires new tooling and materials. A timeline of two to three months is not uncommon.
RELATED: How to design the best prototype for your new product
A timeline of three months may seem like a long time. However, you must understand that a prototype maker probably works with dozens of 3D model designs simultaneously. For the preliminary sample, the factory may use an existing sole and materials just to let designers and developers see what the final results should be. Over three months, you have the chance to evaluate the outsole blueprints, patterns, materials, and colors. Your agent or developer-partner may have to visit the factory to push the development.
How prototypes are made
The progress follows the same path as a specific product’s development. The first step is to have the designs documented and ready for submission. The manufacturing facility will evaluate the design, and if approved, they will give you a detailed contract/agreement. If you need an NDA, have one written by an experienced professional. The actual prototyping process starts from here.
RELATED: Find the best prototype engineering firm services

Pattern and Shoe Last
A “pattern” refers to a two-dimensional diagram of the design. Think of it as a technical sketch annotated with details like materials, shape, dimensions, and colors. The pattern is used as the groundwork for a mockup. A “last” is a foot mold meant to physically represent a person’s foot. The only thing it does is to give the shoe an appropriate shape. A new last can cost hundreds of dollars. For prototyping purposes, you can use an existing previous to save money.
Mockup Shoe
Before even the preliminary sample, the factory will build a mockup shoe first. Nothing is exciting about a mockup, and the materials and components are often of the lowest quality, making the shoes unwearable. The primary purpose of a mockup is as an evaluation tool. Based on the created shape and appearance, the factory determines if the shoe is a good design. You will be involved in the process, and it is your chance to revise your plans and make general improvements to the ideas.
RELATED:10 Steps for product design services designing a prototype
Preliminary Sample
The preliminary sample or a prototype alpha version stage follows the mockup phase. It is not yet the final prototype. At this point, the shoe looks pretty decent or at least close to the intended design. There are probably some missing parts such as logos or embellishments because the sample is only for evaluation purposes. You should find room for improvement and see if the shape and product design are identical to the original idea.
The Prototype
All shoes start as a pair of prototypes, and the final sample has undergone at least two revision sessions based on your inputs. The final version of the prototype should be the best possible representation of your concept. Unless there is another revision, a prototype is identical to the final product.
RELATED: How to reduce painful product development costs for your company
Why make a prototype?
Every product comes to life as a prototype. Whether you are an independent designer or a startup, having a prototype made allows the evaluation of ideas. You may want to remove unnecessary details or add certain features. Generally, a prototype is a window of opportunity to implement final improvements over the overall product design.
Unlike a CAD file or sketches, a prototype is a tangible product. You can touch, feel, and wear the shoes to inspect comfort level, aesthetics, and durability. A prototype is built in pretty much the same quality as the final version.
RELATED: Advantages of using rapid prototyping services for your business

Tips to consider for shoe prototype design
Ensuring you cover all the bases before contacting a factory and submitting your ideas helps to practice due diligence in documentation and partner selection. Here are some valuable tips:
- Sketch the ideas for the exterior look. You don’t have to use CAD for this – a piece of paper will do as long as you put as much detail as possible. Include information about the materials you want for every part of the shoe. Never sketch from just one angle, and having the boots drawn from multiple points of view helps the factory understand your design approach. Don’t forget to write down the dimension of the shoe, including diameter, width, length, and height.
- Sketch the internal parts of the show, such as the insole. The dimension and materials of the internals must be well-documented too.
- When in doubt about the technical aspects of shoe design, seek help from a professional shoe designer or developer. It makes no sense to design a shoe that no factory can prototype.
- When looking for a prototype maker, it is recommended to focus on companies specializing in shoes or footwear. Chances are they have all sorts of tooling required for the job and professionals to guide you through the process.
- Submit the concept sketches in a standard format, like jpeg or png. You can scan the illustrations and convert the format easily on a computer. Tell the factory whether you want to create a one-off prototype for personal use or a mass-produced shoe design in the future. The company can guide you in the right direction based on the information.
- Annotate the scanned image. Include specific information, for example, the type of fabric, the lace design, logo placement, sole materials, dimensions, and thickness. Every little detail is essential.
- If you have the resources, use a 3D rendering service for the design. You may have to hire a 3D modeler to develop the digital drawing.
RELATED: Top tips to create impactful prototype designs for company products
The location of the manufacturing facility affects the final cost. A prototype maker based in your local area doesn’t have to spend money on expensive shipping. Even if the factory is located in different states or provinces, the shipping rate wouldn’t cost too much. If the prototype is made overseas, you must pay the import duty for every sample shipped. The fee depends on your country of origin (where the factory is) and location.
How can Cad Crowd assist?
Working with the best engineering company or prototype design firm is crucial for transforming your ideas into fully functional products. Inventors must choose a company with reasonable service costs, years of experience, and sound policies to protect the inventor’s intellectual property rights. The prototype agency or engineering company must also have the experts and technology needed to finish the project timeously. Always work with the best in the industry.
Don’t forget to patent your shoe design! Use Cad Crowd’s on-demand patent attorney search to get all the help you need navigating the patent process. If you’re looking for expert CAD designers, use our CAD design service to connect with the best designers and drafters in the United States. Contact us today for a free quote.
