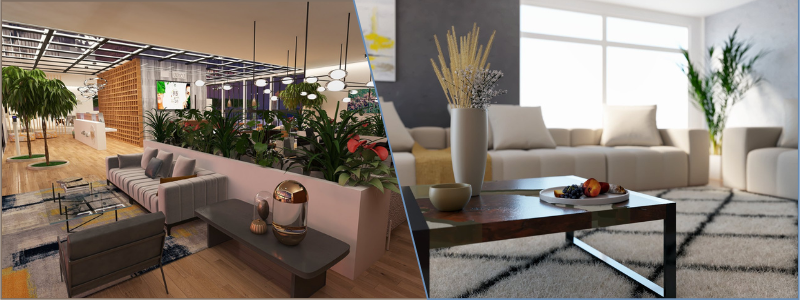
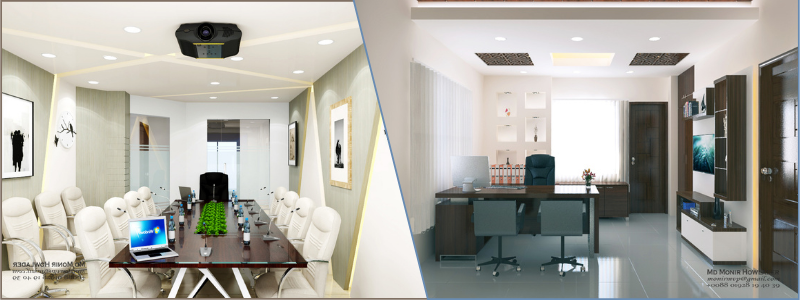
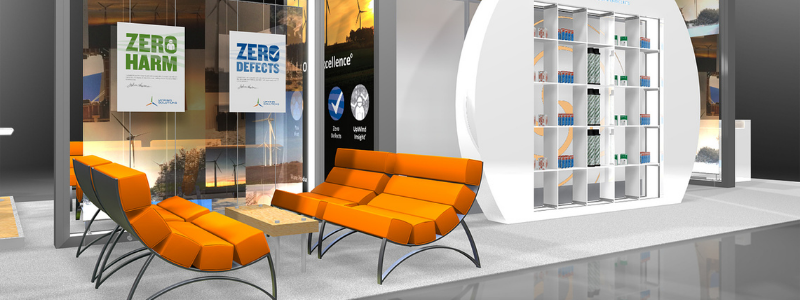
This article looks at the workflow process for interior 3d rendering products at companies. CGI (computer-generated imagery) has become commonplace in various contexts, particularly in the entertainment industries like movies and video games. Still, now it is also approaching mainstream status in the architectural world in many pamphlets, brochures, billboards, and online pages advertising residential and commercial properties. Some (if not most) of the images you see are products of CGI rather than actual photographs. They showcase how the buildings look under perfect lighting conditions in picturesque surroundings filled with a harmonious blend of natural and urban landscapes.
Table of contents
Digital visualization of architectural objects doesn’t stop at the exterior parts either. In this day and age, technology is more than capable of digitally visualizing the intricate details of the building’s interior. IKEA, for example, uses 3D visualization to generate more than 75 percent of all the products in its catalog. The technology has matured enough to the point where small companies and even ordinary homeowners can afford to have a high-quality interior 3D rendering design done by professionals. They can use the rendered image as a part of a design plan or a marketing material when putting a property up for sale.
A glance at 3D rendering history
Architectural visualization is nothing new. It has been around since the days of the ancient Romans, perhaps even earlier, during the peak of the ancient Egyptian civilization. However, as the periods suggest, they created their visualizations using sketches in the most simplistic way possible. Architectural rendering as it is known today did not begin until the Renaissance. In the nineteenth century, more sophistication came into existence when French architects introduced geometry-based visualization and elevation.
RELATED: How 3D rendering has revolutionized interior design
A massive leap in architectural visualization design happened around the same time as the advent of modern personal computers. The first actual CGI came about in 1960 thanks to William Fetter, then an art director at Boeing, who created a digital depiction of a pilot. Ivan Sutherland, widely regarded as the father of computer graphics, came up with Sketchpad about three years later while at MIT. Fast forward to 1975, and the world saw the first 3D model, called “Utah Teapot,” drawn by Martin Newell while at the University of Utah.
Today, when people talk about architectural visualization, they most likely refer to a photorealistic rendering of a 3D model of a building. In both technical and artistic terms, 3D rendering essentially mimics the shape and appearance—and to some extent, behavior—of a real object in a digital image format. The process employs CAD (computer-aided design) software to draw a depiction of the thing and imitate its properties. The next step is to introduce superficial details such as colors and textures to the surface. The final process involves “rendering” the digital 3D object “two-dimensional,” The output image looks as if captured under just the right conditions using a high-resolution camera.
How interior rendering works
In concept, an interior 3D rendering has plenty of similarities to photography. A rendering program points a virtual camera towards an object to compose a photograph. The result to be aesthetically pleasing needs proper lighting and a good viewing angle. The big difference is that all aspects of 3D visualization are adjustable using computer commands. Light sources and directions are configurable; the same thing applies to shadows and reflections. The background and every visible object in it are all virtual.
RELATED: 3D rendering vs. photography: how photorealistic 3D modeling can help your company
To be precise, the camera works by imitating the human eyes or the retina. Every light source emits photons that travel in a straight line until it strikes an object in the real world. Depending on the characteristics of the surface it hits, the photons can be reflected, refracted, or absorbed. The reflected photons then hit an observer’s retina, which converts the interaction into a signal for the brain to analyze and translate, forming an image the retina can see. Inside a camera, the sensor fulfills the retina’s role, and an image processor behind the sensor acts as the brain.
A similar mechanism happens in an interior 3D rendering process, but the sequence of events requires neither an actual light source nor a physical object. Everything is a product of a computer simulation. The thing is replaced with a 3D geometric model, whereas the interaction with light is substituted by many algorithms generated by CAD software. The computational task of simulating light behaviors is referred to as rendering.

Standard interior 3D rendering workflow
Every 3D rendering artist knows the standard workflow of a project very well. On the other hand, a client may not be thoroughly informed yet, especially a first-time buyer. However, it is straightforward enough that any render artist should be able to explain the process to a client in no time. The basics of an interior 3D rendering workflow run in the following progression.
RELATED: 3D rendering costs & 3D visualization prices for firms
A discussion with the renderer
Just like when starting any outsourced project, you much communicate what you need to the provider, who in this case is the rendering professional. During the initial discussion, you must explain the project as clearly as possible to avoid mistakes due to misunderstandings later in the process. The conversation is primarily based on loose ideas without specific references pointing to the 3D models, camera angle, lighting conditions, and resolutions in this early stage.
The exchange gets much more focused when the artist mentions “project brief” somewhere in the deliberation. A project brief describes the task and lists source materials the artist can utilize to produce quality rendering. A comprehensive project brief for an interior design visualization must contain the following files:
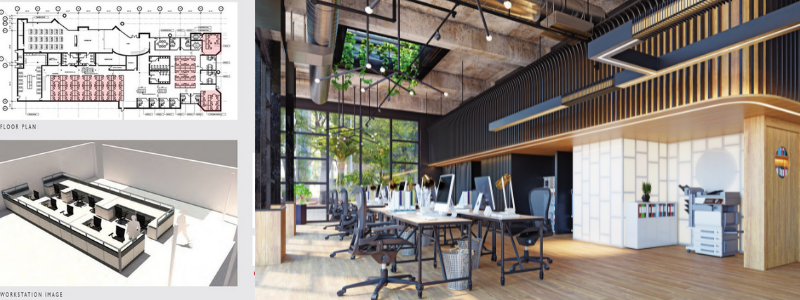
Floor plans
The client needs to provide at least a floor plan (more is better) in the project brief to inform the render artist about the room dimensions and furniture layout. Before the actual rendering process begins, an existing 3D model needs to be. The 3D model must be drawn based only on rough sketches or written descriptions without the floor plans. Both can be reliable source files, but a well-made floor plan has more details and information for the artist to study, such as the objects’ placement and specifications.
RELATED: Tips for hiring and managing freelance CAD design and 3D modeling pros
The rendered image may look quite different from the client’s needs without floor plans. The more urgent issue is that the workflow may take longer because the artist only needs more time to learn about the interior from text descriptions or rudimentary drawings. Also, if the rendered image fails to meet the client’s expectations, it may need to go through several rounds of revisions, pushing the timeline even further. Floor plans are near indispensable. If you can, provide the floor plans in CAD format.
Collection of 3D assets
The primary purpose of a photorealistic rendering is to showcase an interior design and all the objects within its space. In addition to furniture pieces, there can be decorative items such as table lamps, rugs, artworks, books, flowers, records, clocks, and some fixtures. A render artist can search for premium 3D assets or draw the objects and then use them as parts of the rendered image. Unless you want it done that way, make an effort to include your preferred decorative items in 3D format.
RELATED: 5 Tips to get the most out of your interior design service
If you don’t have them ready yet, you can at least inform the artist so that they can find or create specific items for the project. Add Internet links leading to the assets whenever possible. The artist will bill the purchase cost to you for any premium assets upon project completion. Some 3D assets may come in colors, textures, and materials you don’t like, perhaps because they are aesthetically incorrect for the interior design project. The artist will have to adjust to the already purchased assets in such a case. If adjustments are necessary, include the required specifications of the correct objects in brief.
Wall elevations
If floor plans display room and furniture layout, wall elevations show the height of walls and ceilings. The dimensions and position of the doors, windows, power outlets and moldings are clearly defined. When combined into one continuous image, wall elevations and floor plans create the structure of interior space. Together, the two documents give an accurate depiction of room dimensions. Provided with those two references, the render artist can avoid the fundamental error of drawing an incorrect size, a mistake that calls for a potentially significant remake and re-render.

Lighting schemes
The hallmark of a high-quality interior 3D rendering service is a true-to-life depiction of light’s natural behaviors. Whether the interior space takes light from natural or superficial (or both) sources, proper rendering works drawn using the right software can mimic the atmosphere with extreme precision.
You don’t need to include a visual reference in the project brief when it comes to lighting. However, you must specify the light sources and their positions in the interior space. Type of lamps and colors are essential details as they can and will affect the visuals. Some lamps are transparent, heat-resistant plastics, while others are tempered glass. Colors can be yellow or white, soft or bright. When the room takes natural light from the outside, describe the intensity and direction of the light that penetrates the space. Details about light sources will determine the color and the direction of shadows.
Lights behave differently when put into contact with materials of specific colors and textures. For example, metallic objects or shiny floors will reflect and refract incoming rays, affecting the illumination characteristics of nearby objects. A dirty mirror does not reflect light as much as a clean one, and running water makes light behave somewhat chaotic. In short, it is impossible to overestimate the role of lighting in affecting the perceived mood of an interior and the overall photorealism quality of a rendering.
RELATED: Tips for 3D rendering with photorealistic results at your firm
Background images
Certain styles of interior rendering require background images depicting the outside environment. For instance, a “back-to-the-nature” style may need additional touches to peek through the window into the panoramic view of a green outdoor landscape. An urban interior style may not need a background photo at all, but if one is required, a background image of a busy junction will serve the concept well.
A background image is not a bad idea when the interior rendering is meant for a seasonal marketing campaign. Details like snow, orange sun, or light rain help intensify the promotional effect. However, since the focus is on the interior space, keeping the outside elements subtle is better. You can provide the background photos in the project brief, but finding one online is not tricky to leave the task to the render artist. The important thing is for the client to mention whether or not the background is necessary.
Viewing angles
The camera position in the rendered image (therefore the viewing angle) shapes the observer’s opinion. It is all about how you want to show the design and what the observer expects. When making use of 3d interior visualization services, you can ask for a general view of the interior space or close-ups of certain zones. The former is most suitable for conveying the overall atmosphere, while the latter helps highlight decorative items or functional fixtures. It is also possible to have two opposing viewing angles of the same area to offer different perspectives.
Regardless of what you need, a render artist can cater to your request. When it comes to viewing angles, the only way a professional render artist can do it wrong is if the project brief does not mention such instruction.

Resolution and number of renderings
Most rendering artists adopt a standard resolution of 4k. Interior rendering images do not have vector files, which means some details will be lost if you increase the size. At 4k resolution, chances are you never have to make the image any larger for either print media or online pages. If anything, the artist must downsize the image for most purposes. Smaller resolutions like 1920x1080p or 1280x720p should work well for most advertising platforms offline and online.
The number of rendered images affects the timeline a great deal. A single interior rendering of a small room takes about one to two days to complete. If the project requires multiple high-resolution images, it may take a month or longer to complete.
RELATED: Factors affecting the speed of your 3D modeling services
Project brief analysis
Starting from this phase, the client’s only role is to provide feedback regarding the deliverables. The rendering artist now has the project brief with all the required source documents to start working right away. During the early phase of the workflow, most artists do not always immediately turn to their computer and fire up CAD software. At this stage, the works involve making multiple sketches to test some ideas, and it is a trial-and-error process. Once they’ve come up with the right sketch that incorporates all the things the client needs, the next phase begins.
Modeling
The sketch now slowly transforms into a 3D model on a computer. It starts as a basic outline of the interior space, but with refinements, the rough model resembles an interior design in its most basic form. The 3d modeling professionals continue with creating 3D assets such as furniture, lamps, carpets, ceilings, doors, windows, and decorative items. The goal here is to draw the most straightforward possible rendition of the intended design. For the artist, the most important thing is to make all the objects as requested in the project brief visible.
A basic version of an interior rendering should be ready pretty quickly. The rendered image has no color and texture, but it has every object the client wants and is in the correct dimensions. Also known as grayscale rendering, this is the first deliverable. Upon receiving the image, the client gives feedback. As the dimensions are accurate and the required 3D assets are visible, the deliverable doesn’t have much for the client to scrutinize. The image is only a preliminary render to clarify the camera angle, decorative items, and general specifications. The workflow continues unless the client wants to add or remove any 3D assets.
RELATED: Differences between interior design and interior architecture companies

Colored proof 1
The next step deals with superficial details, and the artist adds surface elements such as colors, textures, and materials to the rendered image. He also introduces lights and shadows at this stage. Getting these surface elements correct is the most significant part of the job. If the featured objects consist of different materials, the artist has to fine-tune room brightness, reflections, and refractions, so they appear more natural to human eyes. The rendered image is ready, and the artist sends it to the client for feedback.
Because a “Colored Proof 1” involves adding many little details to every component in the render, there is always a possibility that the client will find some room for improvement. Most photorealistic rendering works have to go through two to three revisions before the artist can apply the finishing touches.
Finishing for final render
After some adjustments to Colored proof 1, the rendered image needs only the last few touches on photo manipulation software. Many of the adjustments relate to the brightness, noise, contrast, and color balance, and most render artists move to Photoshop for these refinements. The final product is a photorealistic rendering of an interior design, complete with all decorative items in lifelike colors and textures.
How Cad Crowd can help
Hiring an interior designer for your individual needs is exciting, and it helps you transform your business interior from a blank canvas into something fresh and exciting. Cad Crowd’s freelance interior designers can assist. Contact us today for a free quote.
